Run Stable Diffusion on Your Own PC: A First-Timer Setup
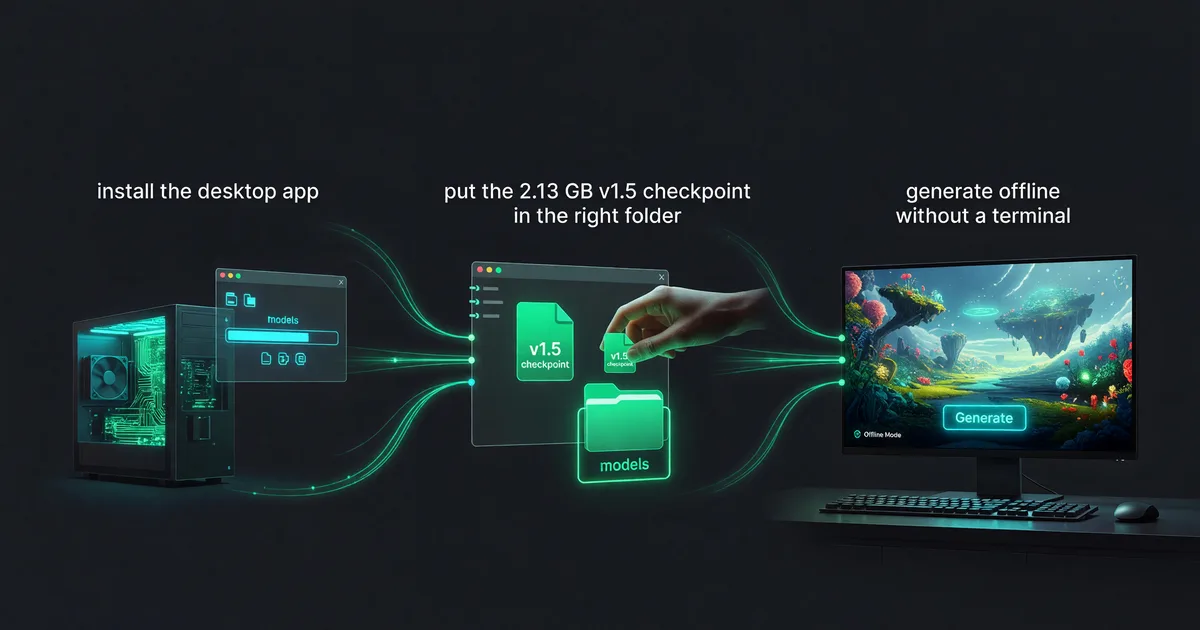
ComfyUI's own docs, step by step: install the desktop app, put the 2.13 GB v1.5 checkpoint in the right folder, and generate offline without a terminal.
The meter runs out somewhere around the 200th image of the month, or a prompt comes back refused, and the next question is whether the same thing can just live on your own drive. It can. The app that runs it is free and open source under GPL-3.0, the model file is 2.13 GB, and on Windows neither part asks you to open a terminal.
One naming thing first, because it derails the search: Stable Diffusion is the model, ComfyUI is the program that runs it. You install the program, then you feed it a model file. Every path, filename and keystroke below is taken from ComfyUI's own documentation at docs.comfy.org as it read on 26 July 2026. Anything the docs do not state is flagged as unstated rather than filled in with a plausible number.
Install Comfy Desktop and skip the Python step
The docs offer three routes. Comfy Desktop "currently supports standalone installation for Windows and MacOS (ARM)". ComfyUI Portable is Windows only, described as "a ComfyUI version that integrates an independent embedded Python environment". Manual installation "supports all system types and GPU types (Nvidia, AMD, Intel, Apple Silicon, Ascend NPU, Cambricon MLU)" and is the one that puts you in a command line. For a first install on Windows, Desktop is the route that fits.
Here are the Windows requirements the docs publish for Comfy Desktop:
- OS: Windows 10 or later
- Architecture: x64 or ARM64
- GPU: a dedicated GPU (NVIDIA / AMD) is recommended for good performance, but not required
- Disk space: at least 4.85 GB recommended per installation
Notice what is missing from that list. The system requirements page catalogues supported hardware all the way down to Cambricon MLU accelerators, and it never publishes a VRAM or RAM minimum for any of them. Guides that hand you a 4GB or 8GB floor are not getting that figure from ComfyUI. Whether your card is enough is something you find out by running it, and the running costs nothing.
The install itself is four steps:
- Go to
https://comfy.org/download. The docs say that page "will automatically detect your platform". - Run the downloaded
.exeinstaller, an NSIS installer, and follow the prompts. - Launch Comfy Desktop from the Start Menu or the desktop shortcut.
- On first open you land on the Welcome screen, "where you can create your first installation".
Two things to settle before you start. ComfyUI's interface runs in a browser, and the docs name a version: "For the best experience, use Google Chrome version 143 or later," because "Earlier versions of Chrome (142 and below) have known issues." Separately, the Python guidance on the system requirements page (3.13 recommended, 3.12 a good fallback, 3.14 workable but rough on custom nodes) is aimed at people assembling their own environment. The Windows desktop page never says whether the installer bundles Python, so treat that as unanswered instead of assuming it either way.
The checkpoint file, and the exact folder it belongs in
This is the step that strands people, and the docs say why in one sentence: "Most ComfyUI installations don't include base models by default." A fresh install is an empty engine bay.
The model the getting-started guide uses is v1-5-pruned-emaonly-fp16.safetensors, from the Stable Diffusion v1.5 archive at huggingface.co/Comfy-Org/stable-diffusion-v1-5-archive. That file page lists it at 2.13 GB under the creativeml-openrail-m licence, with an ordinary download button and no agreement to accept first.
Where it goes depends on which build you installed:
- Comfy Desktop:
<your ComfyUI installation>/ComfyUI/models/checkpoints - ComfyUI Portable:
ComfyUI_windows_portable/ComfyUI/models/checkpoints
There is a shorter way, and on Desktop it is the better one. When a workflow calls for a model you do not have, ComfyUI raises a warning, and the instruction is to "Click the warning to see which model is missing and the download link." Comfy Desktop can then pull the file through the interface itself. The portable build shows the same link but leaves you to place the file.
If you copied the file in by hand while the app was already running, press R. That refreshes the model list, and it is the whole difference between a correct folder and a dropdown that still looks empty.
On Windows, Comfy Desktop keeps its data outside the program folder in two places: %USERPROFILE%\ComfyUI-Installs for installations, and %USERPROFILE%\ComfyUI-Shared for shared models and outputs. Application settings live in %APPDATA%\Comfy Desktop. The docs flag the first two as folders not to delete unless you are removing ComfyUI permanently.
First image: load the template, then two keystrokes
ComfyUI opens on a canvas, which is the second place beginners stall. You are not expected to build the graph. You load one.
- Open the folder icon (workflows) in the sidebar.
- Click "Browse example workflows" at the top of the Workflows panel.
- Select the first default workflow, Image Generation, to load it.
Two other doors exist if somebody hands you a workflow rather than you picking one: drag a ComfyUI-generated image onto the canvas, since those images carry the workflow in their metadata, or import a JSON workflow file through the Workflows menu.
With the template loaded, find the Load Checkpoint node and select the v1.5 file. The docs add a check that prevents a confusing failure later: confirm the file is selected and that "the left/right arrows don't show null".
Then run it. The two official pages disagree here, which is worth knowing before you go hunting for a button that is not on your screen. The getting-started page says to click Run or press Ctrl + Enter. The older text-to-image tutorial says "Click the Queue button or use the shortcut Ctrl + Enter". The keyboard shortcut appears in both. Use that.
The picture shows up in the Save Image node when the run finishes, and you right-click it to save locally. Where the app writes files automatically is not something the getting-started page states, so this walkthrough will not invent a path for it. The Windows page describes %USERPROFILE%\ComfyUI-Shared as the home of shared models and outputs, which is the closest the documentation comes to an answer.
Changing the prompt without dismantling the graph
The default text-to-image workflow is six nodes, and the docs give each a job. Load Checkpoint loads the model, containing the UNet, the CLIP encoder and the VAE. Empty Latent Image creates the blank canvas in latent space. CLIP Text Encoder turns your words into vectors the model can act on. KSampler runs the denoising iterations. VAE Decode converts the result back into pixels. Save Image writes it out.
Only one of those needs touching to change the picture. The docs put it plainly: "Try modifying the text in the CLIP Text Encoder ... or use your own prompts for generation." That node takes a text input, documented as "The text to be encoded. Supports multi-line input and dynamic prompts," alongside the clip model itself.
Which box is your positive prompt and which is the negative one is not a setting on the node. It is wiring. The conditioning that feeds the KSampler's Positive input is what you want in the image, and the one feeding Negative is what you want kept out. Two identical nodes, different destinations.
The prompt box also has documented syntax you would never guess by looking at it:
(beautiful)applies a default weight of 1.1.(beautiful:1.2)raises the weight,(beautiful:0.8)lowers it.{day|night|morning}randomly selects one option each time the prompt is processed.- Escape literal brackets with a backslash, as in
\(word\)and\{word\}. - Embedding files go in
ComfyUI/models/embeddingsand get called from the text asembedding:model_name.
The KSampler holds the four dials everyone argues about, and the docs give each a one-line definition. steps is the number of denoising iterations, where "More steps mean finer details but longer processing time". cfg is the classifier-free guidance scale, which "Controls prompt constraint strength (too high leads to overfitting)". seed is the random seed for noise generation, which "Controls generation randomness". sampler_name is the sampling algorithm, which "Determines the mathematical method for denoising path". Move one at a time, or you will not know which one caused the change.
The parts that can still stop you
Comfy Desktop covers Windows and macOS on Apple Silicon. Anything else means the portable build or a manual install, which puts the command line back in front of you. The supported hardware list is wide: NVIDIA with stable PyTorch on CUDA 13.0, AMD on Linux via ROCm 7.2 stable or nightly, AMD on Windows and Linux for RDNA 3, 3.5 and 4 only, Intel Arc through native PyTorch torch.xpu support, Apple Silicon M1 through M4 with Metal acceleration, plus Ascend NPU, Cambricon MLU and Iluvatar Corex through their own extensions.
CPU is on that list too, as "Use the --cpu parameter (slower)". That is a launch flag, which means the genuinely terminal-free version of this install assumes a GPU is present. If integrated graphics is all you have, the practical reading is that the documented CPU route wants a command line and is slow enough that the docs say so themselves.
Removing it later is easy but not complete. Go to Settings, then Apps, then Installed apps, find Comfy Desktop, click Uninstall. That leaves %APPDATA%\Comfy Desktop, %USERPROFILE%\ComfyUI-Installs and %USERPROFILE%\ComfyUI-Shared behind. Models are the bulky part of that, so delete the folders yourself if you want the disk space back.
Treat the button labels as the soft part of all this. Two official ComfyUI pages already name the same control differently, one calling it Run and the other Queue, and the app ships updates constantly. File paths, folder names and keyboard shortcuts have held steady across those pages. Menu wording has not.
None of this is worth doing if you generate a dozen images a month. A hosted service is quicker to reach and better maintained, and the setup hour costs more than the subscription. Midjourney, DALL·E 3, FLUX and Leonardo all cover that case, and the Midjourney and Stable Diffusion comparison plus our three-way look at the hosted options work through the trade. Running locally wins on a narrower set of reasons: no per-image charge at volume, no content filter, checkpoints you choose yourself, and images that never leave the machine. Those are real reasons. They are simply not everyone's.
Keep reading

How to Write With AI Without Sounding Like a Robot
Learn how to write with AI without sounding robotic. Master prompt engineering, the write-then-edit approach, voice preservation techniques, and tools like…
Hermes Agent Tutorial: Self-Improving AI Setup
Install and configure Hermes Agent so it remembers your workflows, builds reusable skills, and gets better at your tasks over time.

How to Clone Your Voice in ElevenLabs: A Beginner Guide
What ElevenLabs' docs actually say about instant voice cloning: the plan you need, the audio spec, the five settings, and the limits.